Thursday, December 20, 2007

Old v New

Here is the kit lens, hand held, no flash.


And here is my new lens, 50 mm, f/1.8...

Portrait Mode


This is my first photo with my new 50mm f/1.8 lens, using portrait mode. When I took it and looked in the view finder of the camera, it looked like it came out terrible. I don't know why it looks so much better to me here :D

Tuesday, December 18, 2007

I forgot...

...my favorite clear subject-blurred bg photo!


These are Mickey Mouse wine stoppers that were all lined up for sale in Epcot. I'm so pleased with the way this photo came out but I wish I would have made sure the stoppers were all lined up a little better before taking it. Oh well... next time I'll get it right :D

Monday, December 17, 2007

Okay, here are a few of my older ones with the blurred background...


I will do some new ones soon :D

Group 2 Assignment 2

Aperture:

The opening of the lens is like the pupil in your eye… if you look in the mirror in low light, your pupil will be dilated (wide open). If you then turn the light on quickly, your pupil will quickly close down to a small opening. This is your eye on auto mode controlling how much light is entering the eye. The same is true for the lens of a camera… the larger the opening is, the more light it lets in and the smaller the opening, the less light it lets in. The aperture itself is made up of several overlapping metal blades that work together to increase the size of the opening or decrease it. There are several size openings called “f stops”. The most common ones are f/2, f/2.8, f/4, f/5.6, f/8, f/11, f/16, and f/22.

The part of this that can be sometimes confusing is the fact that the smaller the f/number, the larger the opening in the lens… f/2 is very large opening where f/22 is a very tiny opening. If you can think of it in terms of fractions, 1/8 is larger than 1/16, then f/8 is a larger opening than f/16.

Every time you move from one f/stop to another, you either double or cut in half the amount of light that you have entering your lens. For example, if you change from f/11 to f/16, you just cut your light in half, and then to f/22 in half again… this is not as completely dramatic as it sounds (use the shutter speed with the change in aperture and you can completely control your light).

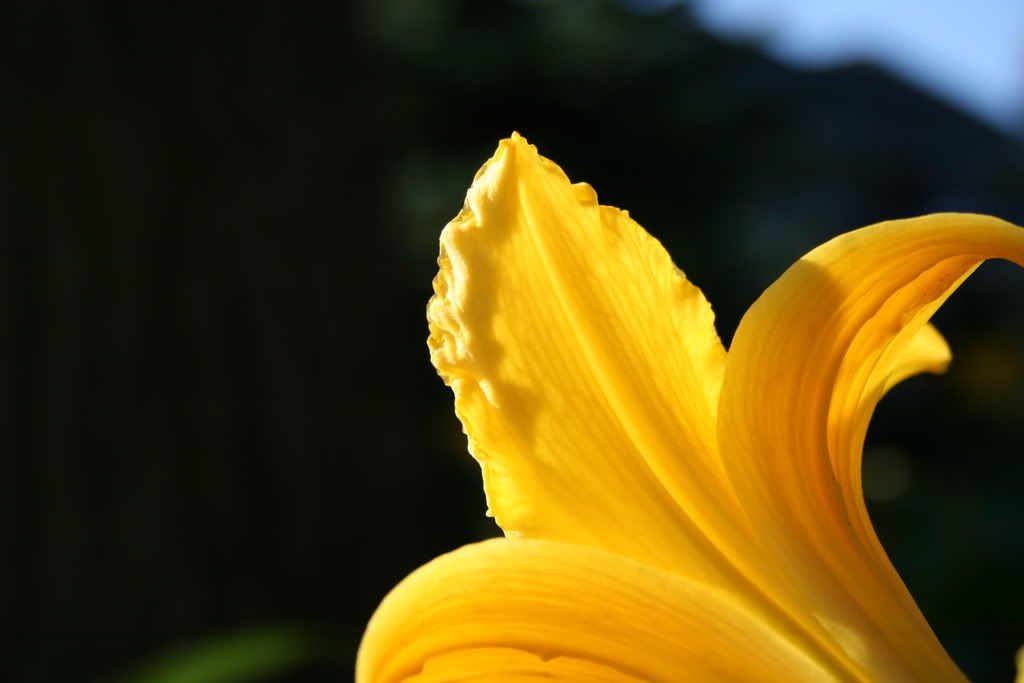
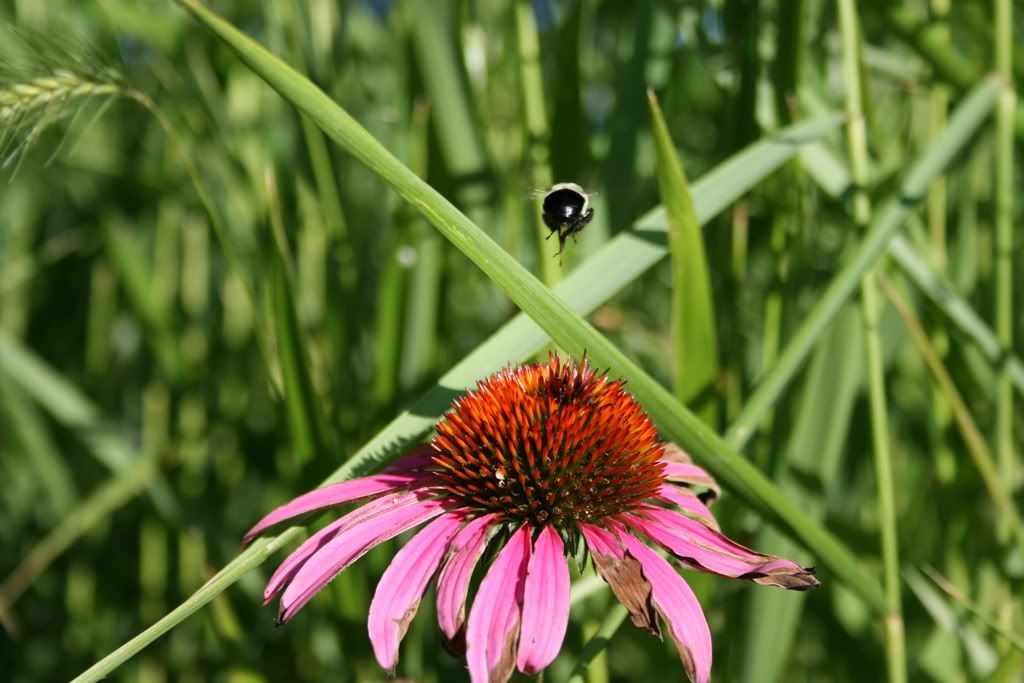
Now, here is the really neat part about aperture… it really affects the way the picture looks in the end. With the smaller numbered apertures (larger opening), you get a blurred background. With the larger numbered apertures (smaller opening), you get a more clear background.

When you see a close up picture with only a small section in focus (macro photography), then the photographer used probably f/2 or f/2.8. When you see the really nice landscape shots with everything in focus, the photographer probably used f/16 or f/22. Everything else sort of falls in the middle depending on how blurred or clear the background is.

Mastering Auto Modes:

We are going master the auto modes first and work our way to the manual modes. This week, we are going to take a look at Portrait Mode. When you put your dial on portrait mode, you are telling your camera that you want to use one of the small numbered f/stops (which is a large opening which makes the background blurry). Your camera will probably choose anything from f/2 (if the lens is capable) up to f/4 or f/5.6. It won’t choose f/11, f/16, or f/22 because this will make the background clear which is used in landscape mode (we’ll cover that one later). I think that the really small numbered f/stops like f/1.8 or f/2 are used in macro photography (looks like you used a magnifying glass to take the picture).

So, for this week, choose portrait mode and see how your camera reacts (if you are not sure which one on your dial is portrait mode, check your manual – mine is the profile of the lady – Nikon camera). If you are working in lower light, the camera will also choose to use a slower shutter speed… don’t be surprised by this. If the camera decides to keep the shutter open longer than you expected, you will probably get “camera shake”. Just use a tripod or place on a table or something to stabilize it. We’ll cover shutter speeds a little later. For now though we are trying to get a clear subject and a blurred background. This represents the lower end of the aperture scale.

Have fun with your portraits this week… remember, anything can be taken in portrait mode… not just people. It’s just more of a close up and blurred background.

Sunday, December 16, 2007

More with Light! :D

I finally got a chance to take a few really thinking about the light.

So many people had lovely tree photos that I wanted to try one. Mine didn't come out quite as well but I took it with a lot of bright light coming in the window on the tree and I wonder how it might change if I tried this one again at night.


When we sat down to dinner, this glass of wine just looked amazing. I swear I had never seen such a pretty glass of wine! It was just sparkling all over the place!

I wanted to get a photo that really showed how it was so colorful and pretty but I couldn't get it to work! This is the best I could get it to come out, but it's no where near how it actually looked. I did try both with and without flash but the colors and sparkles just weren't coming through. Any suggestions would be really appreciated. I just kept thinking how Sandie said that we should be able to capture anything we see, but I couldn't figure out how!


I gave up on trying to get the color right and just went for an interesting photo. This one came out acceptable. But I'm just still bummed about the colors!

Thursday, December 13, 2007

Photoshop Mania :D

I've asked for a book or 2 on Photoshop for Xmas because I always felt like there was a lot I just wasn't "getting" about the program.. but tonight I had a breakthrough! I know this isn't really interesting for people who know what they are doing but for me this was the coolest stuff I've ever done. I feel like what I did tonight has opened so many doors for me and I'm so much less frustrated with Photoshop right now!! I just had to share this...


This is so exciting for me.. this odd object actually looks semi-3-D!! :D :D :D

Tuesday, December 11, 2007

My Assignment #1 Photos

I'm not home for much daylight in the winter.. leave for work and it's dark. Get home from work and its pitch black outside already... so getting some shots in different light might be hard right now, but I dug through my previous photos with my xti and found these that I thought paid special attention to lightning when I took them.


Sunset in Orlando - Animal Kindgom Villas


Sunset in Chicago - Venitian Night 07


A day lily on an early summer morning


A cone flower in the middle of the day - noon sunlight


I'm going to keep my eyes open for other interesting lighting though, even if it's at work or somewhere I don't have my camera. Maybe if I ever get my Christmas tree up this year, I might be able to create some new interesting lighting.... :)

Assignment 1 - Viewing Light

VIEWING LIGHT

Because a camera is based on light, this week whether you have your camera with you or not, we should try to observe different sources of light and how they fall on different subjects. Theoretically, whatever we see, we should be able to photograph. So, take note of what lighting situations you are drawn to, observe what the light source is, where it comes from, which angle and which way looking at it seems the most interesting. For example, my cat was laying on my bed yesterday and the sunlight was coming through the window. Because it was coming in at a 45 degree angle and hitting him from behind, it caused his fur to “glow” around the edges. This would be interesting to photograph. Also, there are many Christmas lights at night for this time of year… As you look at your tree or lights in the snow, think of different angles that would be interesting to photograph from. As sun peaks through trees and creates long shadows on the snow, think about why that’s interesting… the sun is low in the sky and makes longer lines than midday. All in all, try to observe light, the source, the angle, and why it appeared interesting… even if you don’t catch it on film. Then, feel free to report back and post what you saw. This is to practice seeing with the eyes of a photographer.

Photo Survey

Q and A from the photo group about my experience so far...

What camera do you own? Cannon Rebel XTi
Is it film or digital? Digital
Is it an SLR or a regular camera? SLR
What level would you say you are at with photography? Beginner
Do you own any photo editing software? Yes
If so, what kind? Photoshop v6 and Elements v3
What level would you consider yourself in your software? Beginner/Intermediate
Have you set up a blog yet? Here it is! :)
How long have you been doing photography? A few months
What sorts of topics would you like to see covered? Anything is good by me.. I am interested in it all!

In the beginning...

This blog is for my photos. I'm using it with the groups on Scrapbook.com to hopefully improve my photo taking skills!